Well, we made it to the 28th of November without any of the white stuff, but aas the turkey began to digest, and lights started going up, the flakes started falling. This morning we woke up to about 2 or 3 inches on the ground and in the trees. Its officially Christmas in Thornton... We hope everyone had a good Thanksgiving. We're looking forward to Christmas.
Saturday, November 29, 2008
Tuesday, November 25, 2008
$40 built-ins
I've been meaning to post this for a while. We have been making some changes around the house, and Kristie decided it was time for the computer to have a new home. Until now, it has lived on our kitchen table, because I spent so much time on it for school, but didn't like being alone all day and night in the guest bedroom. Obviously, the kitchen table wasn't the greatest place either, so once school was over in summer, Kristie had the idea to build a place for the desk in a corner of the living room where we had a bookcase.
Here is what it looked like after we cleaned off the old book case. If you look closely, you can see the sweet handyman job I did cutting a hole for the stereo with a cordless drill like 8 years ago.
Ok, so now on to the new shelves and desk. The project was actually quite simple. to make the shelves you will need the following:
Materials:
4'-0" x 8'-0" sheet of 1/4" furniture grade birch plywood.
1/4" x 2" poplar trim to cover the fronts
Scrap wood to cut into 1 1/2" segments to support the hollow interior of the shelves
Pin nails for a clean look on the assembled pieces.
Wood Stain/ Protectant
Wood glue
Screws/ Drywall Anchors
Tools:
A band saw or jig saw with a guide for cutting straight lines in the plywood.
A pencil
A measuring tape (I am super exact and use a good ruler for the smaller measurements)
Sandpaper
Clamps for glue-up/ assembly.
A hammer/ pin nailer (its good to have access to the school's shop.)
Staining Rags
Drill/ Screwdriver
Level
Something that will give to a good right angle.
Prep:
Begin by skecthing out what you want to do. try drawing the entire wall it will go on to get a feel of how the shelves will look in the context of the rest of your stuff.
Next, take careful measurements of the area you want to build in. don't assume corners are at 45 or 90 degree angles, either. A little time here will save you a lot of headaches later.
Shopping:
Before you go to your local home improvement store, consider reusing some leftover wood from another project or a pice of furniture that isn't quite working for you anymore. I've seen some pretty amazing stuff created from pieces that would have been thrown out. Also, you can offset your project cost a lot by selling old stuff that you are replacing with the shleves. We made back almost all our money by selling the old bookcase on craigslist.
Make a drawing of your project that lays out the components in the way that allows you to get the most from the material you buy. Waste material is wasted money, and you can avoid 80% of it by planning out how you cut up the sheet(s) you buy.
Finally, use the lowest grade stuff for the ares you won't see, like the interior supports and wall hangers.
Production pointers:
The most important thing here is to make sure your top and bottom pieces are the same. After you glue them up, use a sander to match up the edges. This way, you will have a nice clean edge for the front and side trim.
Try dryfitting them into place before doing a final sanding for the perfect fit.
Make sure you provide plenty of interior cross-support for wide desk sections. you want the lightness of a hollow desk, with the structural integrity of something solid.
Don't forget to leave room around the edges for the wall hangers to slide into.
Don't be like me, and forget to make a place for the cords.
Installation:
A few notes on installation:
You should mount desks to allow for 27-28" of clear space below. the surface should be at least 20" deep to leave room your legs.
Leave plenty of room above the desk below any upper shelves, so you can add a lamp/ other tall stuff.
Use a level.
The dry fit. I used scrap wood for the fronts and the supports for the hollow centers, and for the hangers on the wall. It took a few hours to get everything cut and assembled, and then a few more for glue-up and pin nailing.
We did the build before our trip, and Kristie stained it all when we got home. Here is how it all looks now.
Sunday, November 16, 2008
a sign of the gay-pocolypse?

This morning there was a football game between the Mormons (BYU), and the Air Force in the hometown of Focus on the Family.
This year's "Don't Ask, Don't Tell" Bowl was a ratings bonanza as the eyes of gay fans across the nation were riveted to their televisions in shocked disbelieve that this November had some how gotten even worse for them.
Monday, November 10, 2008
australia and new zealand - week 2 - new zealand
After our week together, we flew down to New South Wales, where I left Kristie to explore Sydney (scroll down for cool pics from her week) while I went the 2008 New Zealand Architecture Master Class in Abel Tasman National Park. While it couldn't compare with the week we spent in Queensland, it was a learning experience I will never forget. The tutors were amazing, New Zealand was beautiful, and the people I met were so inspiring. I couldn't recommend the class more.
One note on my stay in Nelson the night before the class. I got a room at a great little bed and breakfast called the Baywick Inn. The innkeepers were really cool. When I came down for breakfast, I ate in a room that had been converted into a veritable shrine to the british Royal family. This is what just one corner looked like:
 |
| From NZ Master Class |
Awesome. About 70 percent of the collection was special edition shortbread cookie tins for royal birthdays, births and wedding anniversaries. I made the innkeeper (thanks janet) hold one of the her pieces for me... there is a picture in the slideshow.
 |
| From NZ Master Class |
Awaroa Inlet, Abel Tasman National Park. Our site for the week. the lines are where the shells pile up as the tide comes and goes.
 |
| From NZ Master Class |
Three of our tutors, (left to right) Ian Athfield, Richard Leplastrier, and Peter Stutchbury.
 |
| From NZ Master Class |
Our project was to design a backpackers hut for the national park, as well as housing and research facilities for a full-time rangers and season research staff. Here we are getting our first introduction to the site.
 |
| From NZ Master Class |
 |
| From NZ Master Class |
On one of our site visits the tide was too high, so we had to wade across, so I decided to do like I'd seen the Kiwis do, and go "hobbit". My sissy feet + an afternoon walking across a sea bed covered in open and broken clamshells = lots of pain.
 |
| From NZ Master Class |
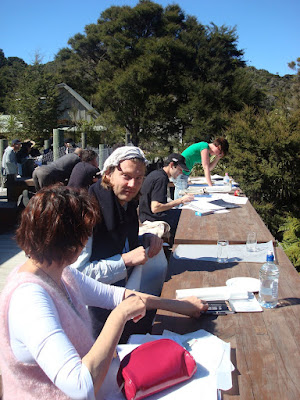
Sketching at the site
 |
| From NZ Master Class |
Me at Awaroa Lodge, where we had our studio
 |
| From NZ Master Class |
Working in the Studio
 |
| From NZ Master Class |
The polar bear plunge in 4 degree celsius (39 degree Fahrenheit) water. The only let us go twice... something about my rock hard physique intimidating the other guys in the class.
 |
| From NZ Master Class |
Working out in the sunlight.
 |
| From NZ Master Class |
Fancy Dress for the party on the last night of the class. (from right to left, we had Julio, Pierre, Adam, Simone, Scott, Masimiliano, and Mike
 |
| From NZ Master Class |
The boat waiting to take me back, so I could catch my flight and see Kristie again. This was the longest we've been apart since she was in college, and I missed her a lot. Besides, I was really excited to meet her new boyfriend.
Ok. That's enough about our big trip. It was a lot of fun, and we'd recommend it to everyone.
Here is a slideshow for ya'll...
australia and new zealand - week 2 - sydney
hey everyone, sorry for the long delays between posts....
After our first week in Queensland, I went off to my class in new Zealand, and Kristie stayed in Australia. She was in Sydney for 8 days, and got to see a lot of the city.
 |
| From Australia and New Zealand Part 2 |
The Opera House and Harbour Bridge from the Sydney Harbour Cruise
 |
| From Australia and New Zealand Part 2 |
This dude just chilled in the area where the tourists get off the cruise ships, posing for pictures and playing his didgeridoo. He made so much cash.
 |
| From Australia and New Zealand Part 2 |
A relaxing day at Bondi Beach
 |
| From Australia and New Zealand Part 2 |
Scary bats in the trees at the Botanical Gardens
 |
| From Australia and New Zealand Part 2 |
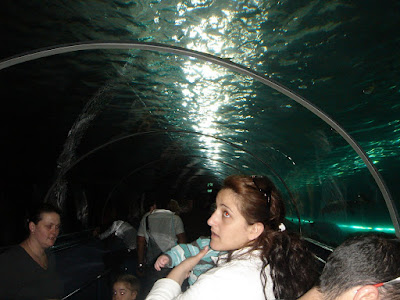
Inside the Shark Exhibit tube at the Sydney Aquarium. Ya, Australia is home to lots of things that can kill/ eat you.
 |
| From Australia and New Zealand Part 2 |
One morning Kristie woke up to find that the Sydney Marathon route went right past her balcony.
 |
| From Australia and New Zealand Part 2 |
The coolest clock/ calendar contraption ever to grace the inside of a mall. Available at Brookstone.
 |
| From Australia and New Zealand Part 2 |
Kristie at the botanical Gardens, with the harbor behind her.
Here is a slideshow with more from her time in Sydney:
Wednesday, November 05, 2008
Tuesday, November 04, 2008
burritos for obama
Unless you are in my family. Then use your time to hide all your money and guns, because an islamic communist totalitarian satanic terrorist america hating regime is coming to town, and you'll need to be ready. Just kidding.


